AustinDiggers.com - Arrowhead Message Boards
THE MESSAGE BOARD POINT CHATTER IS NOW CLOSED TO ALL NEW POSTS.
I have started repairing some of my broken points that would have been killer. Im having good luck fixing the breaks and cracks but making the paint look good is a problem.I need the paint to shine somewhat. What do yall suggest? IM using modeling clay to form the broken tips then baking the points in the oven on low heat to harden the clay
Josh, You will always have the disinction of being absolutly NUMBER ONE. .
At least once a year, from the begining of time, somebody asks if its ethical to have
points repaired. Battle royal always ensues with different opinions.
NOBODY has EVER said, " hey, I'm a hobbyist how can I do a home fix ?"
After all the picture taking is done, I fix a lot of my doable points. I'll post soon how I go about it
[ I dont have enough time at this sitting ! ]
Josh, cant help you at all with the paint problem, I use an entirely different system, maybe its some help.
I use 30 min cure clear epoxy colored with artist chalks. The epoxy really bonds well with no glue on seam showing. If you go light on the pigment, it can have great matching transparency to the original.
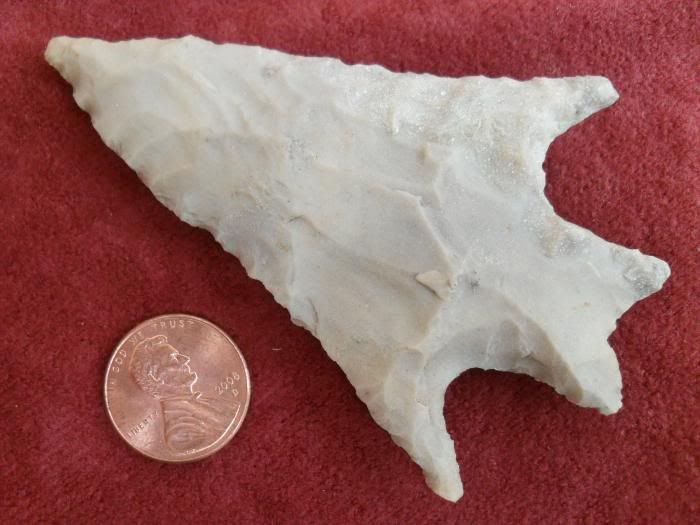
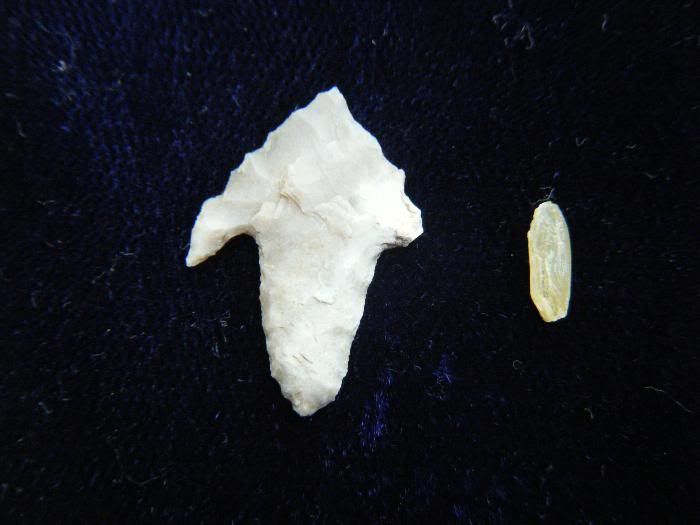
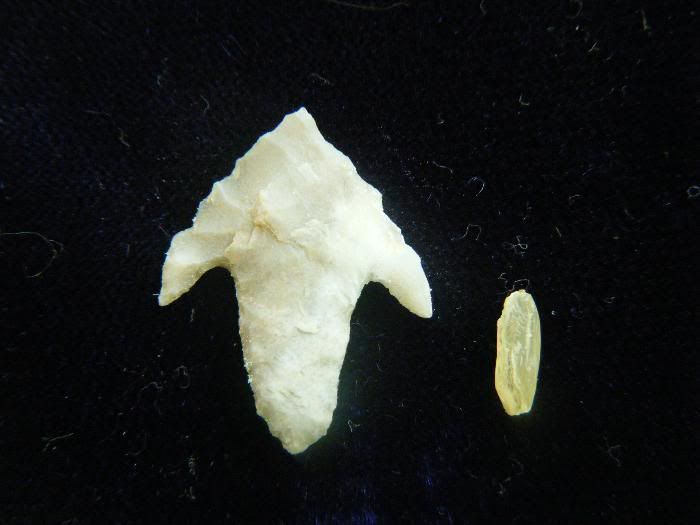
Here's a pic of all that is needed plus some past customers.
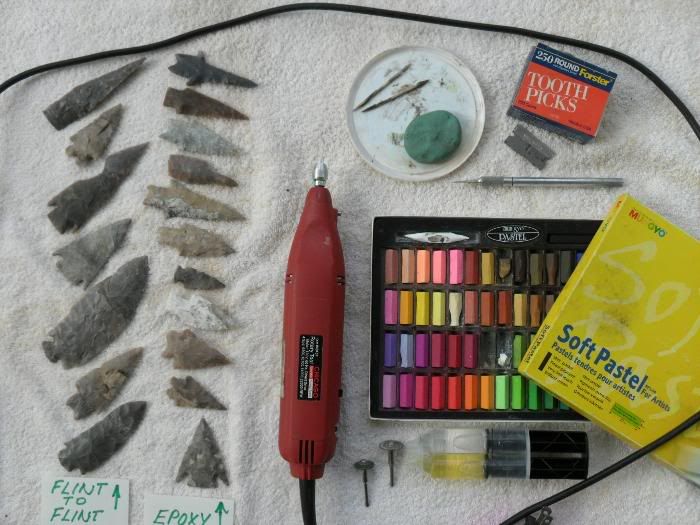
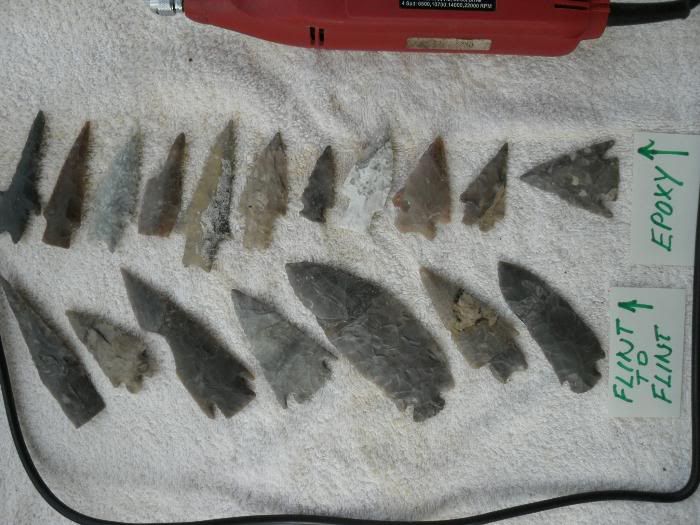
Little closer, all in the epoxy row are epoxy repaired. I tried glueing close match flint together after much trimming with diamond tools. not very good.
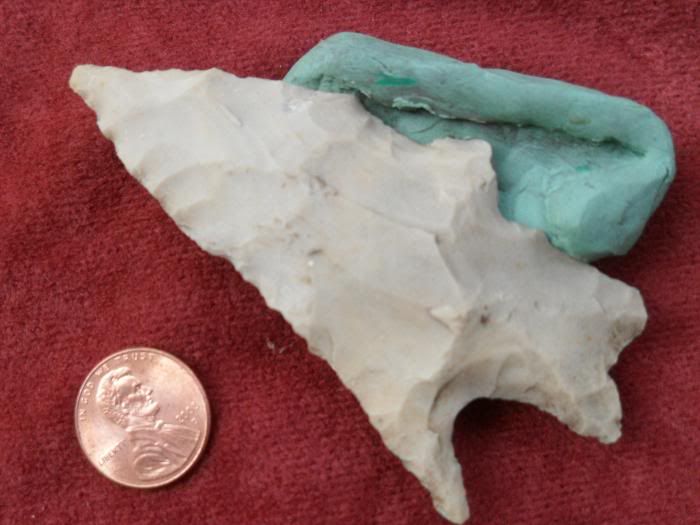
The main feature of this method is to create a good "swimming pool" for the wet epoxy.
I use a bit of non hardening modeling clay, GENTLY molded around a good part. Remove and CAREFULLY reposition where the fix is needed. If done perfectly, the side in the clay needs absolutly no final trimming / finishing.
The big Perd example is an excelent sample subject as the whole side needs help !
DONOT mess with 30 min cure epox for FOUR HOURS !
OOPS. . Dont like your first try. . .Cut the epoxy patch off close to the original flint then with a blade, work under the edge of the epoxy. It will eventually let go.
Any more questions Josh, I'll be right here !
I've tried both, and paint is so much easier to work with, than the dried powders. All you need to get are the $.69 bottles from hobby lobby, basic colors plus a few extra's, all depending on the materials you're working with, and a color wheel, if you're not familiar with the color mixing.
Josh, your fixes are excellent. The color match can be a nightmare / challenge for anybody's repair
system.
Variables of incandescent, florescent, natural daylight and the wet or dry [ humidity ] of the piece
can be big factors.
I suspect Dr Gomer uses an electronic scanner same as they use in the Home Depot paint dept. I have seen quite a few of
Gomer rehabilitated points and even knowing they were repaired never spotted a hint of color variation.
Your original posted question was about the finish sheen. Have you experimented with mixing flat, matte and gloss clear in the soup before applying ?
Exactly what type of paint do you use [ Acrylic, hobby models, oil, etc ? ]
Brought forward for some people interested in ideas for do it yourself point restoration
I've had mixed success using expoxy & mixing in water based paints. It takes lots & lots of practice, for none of the pros will share their trade secrets for obvious reasons. Try Hobby Lobby for your 5 minute epoxy & cheap water base paints.
Hal, I almost have all my materials together. Picked up the chalk and modeling clay last night. I going to get the epoxy and hopefully a dremel tonight. I will keep you posted on my success or failures. A couple questions though, have you had any problems with the epoxy sticking to the modeling clay? Also, when you make the imprint in the modeling clay, that only gives you "flaking" on one side; I guess the other side you have to use the dremel to match the flaking?
Well if you went so far as to pickup the first materials, you must be serious...Here's the last
of the very minutest details, some cover your queries..
Harbor Freight has the Dremel brand equivelent...$19.99 stock number 40457.....DONT BUY the good looking 'rotary tool kit' for $9.99....It's a one speed of about 30,000 RPM....you can hardly hold it when running.
Epoxy does not eat into the clay mold but some sticks to both flint & Epox when removed...I use a tooth brush dipped in mineral spirits ( or turpentine ) to remove, then soapy water to remove oily film.
RG is using the 5 minute epox then painting...to mix and blend in coloring your going to need every minute of the THIRTY MINUTE cure time ( starts to become unworkable in about 9 minutes )
The emory wheel cutoff disc does 94% of the heavy final trim ( using a sidewise action, not like cutting off a piece of pipe ) DONT use the drum sander.
The final flaking pattern is purely hand crafted...Just think " if Dr Golmer can do it...'I' can do it " ( I got a lot of artistic respect for Gomer, look back at his featured icon on the front page....All the largest of his repairs are hand tooled )
Right from day 1 I have used the Lapidary discs for the final finish...its rubber with grit in it. Three different grit sizes. Final finish is critical, I have tried the finest diamond dust bits but they leave minute gouge lines.
Some repairs are very small, the small epoxy quantity needed the more careful you must be with the 50-50 mix ( the last little bit on the mixing surface is NOT usable it doesn't get properly blended. )
To make swirls or different pattern colors, just seperate some mix into a seperate pile and color as
needed.
No matter what the color may be, even translucent, I am continually surprised how much GRAY tone is needed.
Actually Hal, I would mix my paint first, all depending on the translucency, and then mix into epoxy. It doesn't take much paint, especially if the point has some translucency. The more you work at this, the easier it becomes. It's been a couple of years since I dabbled at it, but it was sure fun. The learning process can be a little frustrating, so just hang in there, you may have to do the same point over several times, before getting it to your liking.
Good luck
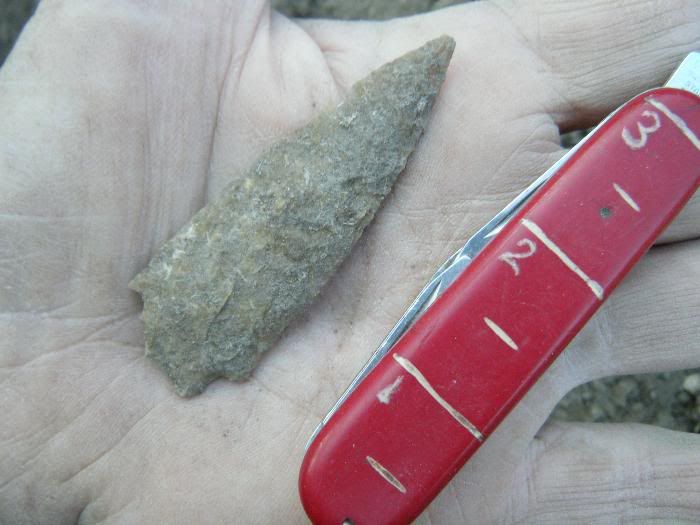
my before
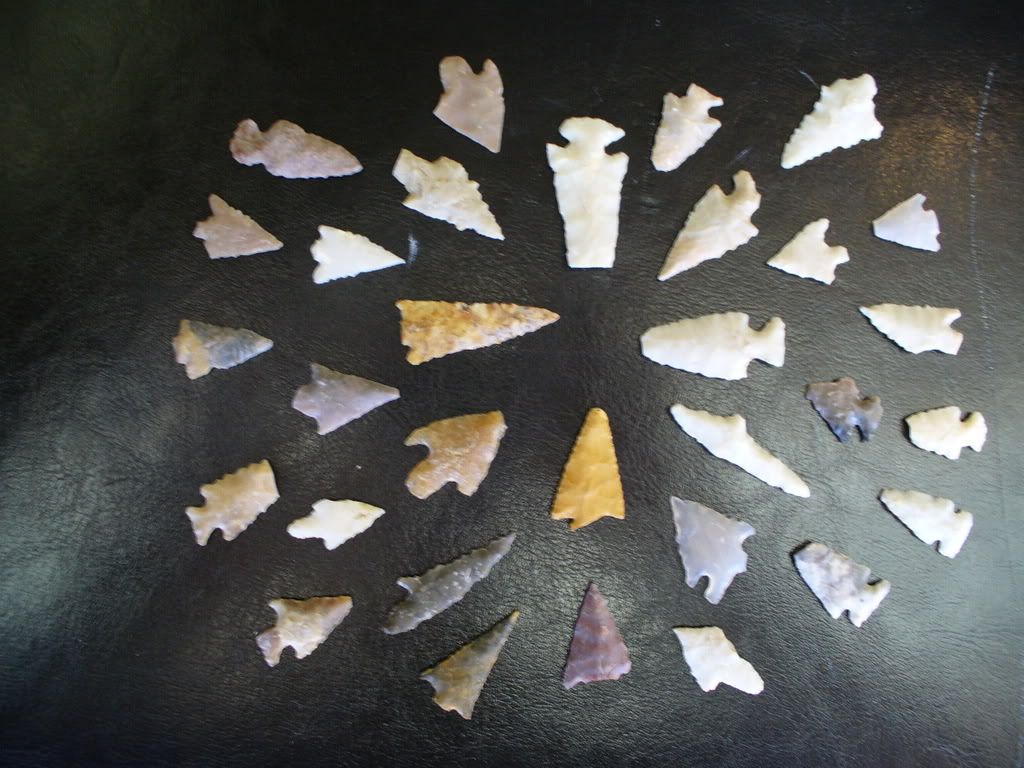
and after
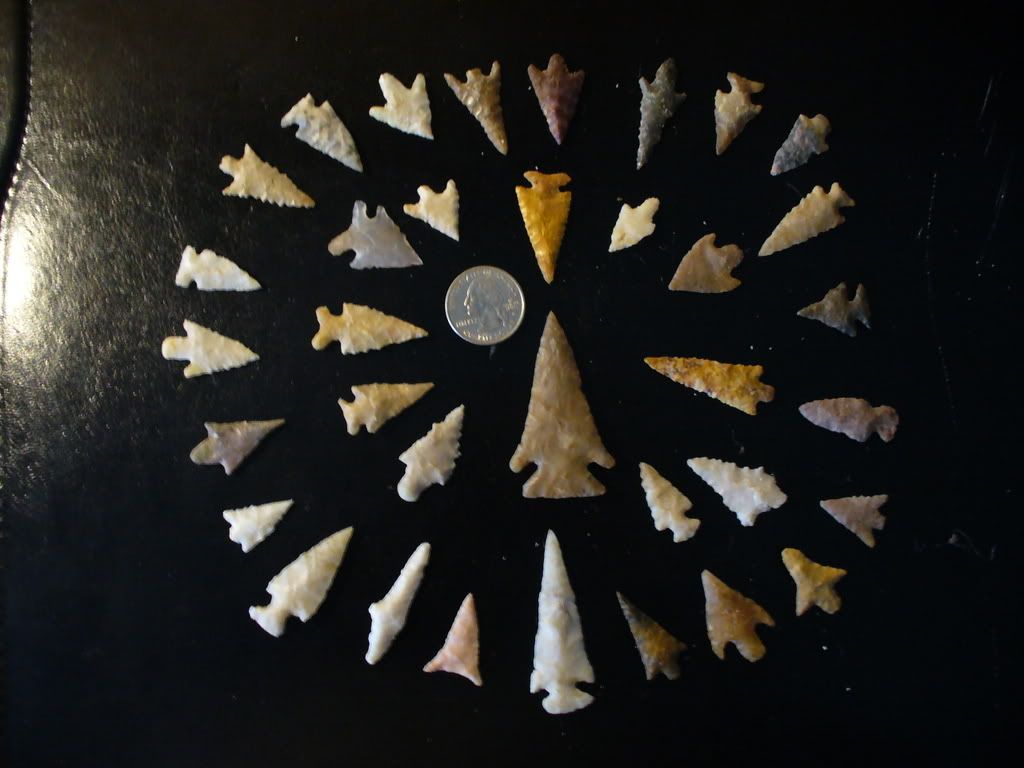
Excellent workmanship rg. Practice, practice, practice does make perfect whatever method or materials are
used .. Those small bird points are a challenge to get right, such a small area of epoxy to get serrated.
I have had good results using a product called Apoxie sculpt. It dries at a nice rate that allows you to shape and remove excess material before the dremel. That said, I have tried lots of paints and never can get the color right.
Do you know of any color products that do not change darkness when they dry?
I can't help you there. Some of mine have held up, while others have discolored over the years, since I did my restorations. The good news is that I can simply redo them, but I haven't gotten around to it. My whites & translucents have faired the worst, for whatever reasons? I'd love to figure it out someday!
Best of luck!
Do you know of any color products that do not change darkness when they dry?
Skipping to the bottom line..." no definitive answer from me "
Looking back at some old pieces, maybe 7 yrs old for this post, I can see all are not matching BUT..Some subtlely so I dont know if it's a real change or just my original poor color balance. Too late for me to change methods after all these yrs.
For others with similar conditions, might be good to do some basic testing ...
Some ' clear' epoxies turned very amber when mixed..I settled on and never used anything other than the NAPA auto store brand clear.
A couple of other brand names had a bad effect with some colors I was trying to use...One I especially remember...The pure white I was using turned a very definite GRAY >

In all these yrs, the one product I meant to try I never did...Thats the enameled mix your dentist uses
for non gold crowns....At $600. plus...you can bet he's not using a repair patch that his customers are likely to come back with green teeth

Badger just showed me a big WHITE Perd that I did a small repair on a barb. It was on a special wall hanging frame and had a date on it of 8 - '09
The fix had indeed turned noticeably a tan color.
I'm assuming that it is the epoxy that modifies with age and the dark repairs just dont show it up
So I'm back to testing again...first product will be that clear acrylic ( completely a different molecular compound than epoxy ) sold in the better hobby shops ( Michaels & Hobby Lobby )
I'll get back to you in 3 years with a report

Hey Hal,
I think I may have found a possible solution to the discoloring problem. I did a little searching online and found this product (go to website) http://www.tapplastics.com/shop/product.php?pid=386
You can also google clear epoxy resin to pull up some more hits. Products and prices vary depending on how involved you want to get. I think the one I have listed will be the most affordable route, but I don't know if you can still use the chalk with it or not. I am thinking about ordering some and trying it myself.
I think I may have found a possible solution to the discoloring problem. I did a little searching online and found this product (go to website) http://www.tapplastics.com/shop/product.php?pid=386
Good site, good product. Must be a better product than the household epoxy....Mrs housewife wouldn't care if her fix on a can opener turned brown.
Notice that same company offers a $6. " HOW TO MAKE RESIN JEWELRY " book... Thats GOTTA define exactly what colors to use.
I'm going to be testing CastinCraft, POLYESTER casting resin from Hobby lobby. advertised use is for those big desk paperweights with grandmothers teeth in the middle.
As I remember my last try with this item, although it sounds good,,minimum mix is about 1 ounce ( for a flint fix that might be the size of 2 pinheads ) AND
the cure time is MINIMUM of 24 hrs, if the mix was
slightly off, could be days.
All this testing is fun, unfortunatly the issue is fading over time...a year + ??

Brought forward 11/02/11 for new interest.
I have been busy knapping and trying to heat treat rock and thats a c**** but I think i might have to give the epoxy a run and try and do some more repairs i got a few worth trying
I hate to change the subject, but don't know how to contact you directly.
Joshua, do you have a brother named Danny??? If so I have met you and ridden your horses! I didn't know you were into this arrowhead business. You do very nice work.
This old posting brought up to date for screen digger Jacob

